How I am going to build an APK with React Native?
Step -1


Step -2
keytool -genkey -v -keystore my-release-key.keystore -alias my-key-alias -keyalg RSA -keysize 2048 -validity 10000
or
keytool -genkey -v -keystore mykeystore.keystore -alias mykeyalias -keyalg RSA -keysize 2048 -validity 10000
Step -3

Step -4
Now, we have to place the created keystore file under the android/app directory in your react native project folder.
In My case
Step -5
Add the following lines to android\app\build.gradle
Like this

..........................................................................................................................................................................................................................
Step -6
Add the following lines to gradle.properties
or
android/gradle.properties
 Copy the code paste it

Note: my-release-key.keystore should be same name
...................................................................................................................................................................................................................................

............................................................................................................................................................................................................................
Regardless of the name of the .apk file, the package name of the Application contents inside it must be unique.
Apart from correcting app name in the AndroidManifest.xml ,
I also had to change applicationId in the android/app/gradle.build file.
defaultConfig {
applicationId "com.example.changednameofmyapp"
}
by default it's false
def enableSeparateBuildPerCPUArchitecture = true
Using command prompt or Terminal
Then open the terminal on your computer and type:
Debug
keytool -list -alias androiddebugkey -keystore android\app\debug.keystore
if you want to print all output
use -v flag
keytool -list -v -alias androiddebugkey -keystore android\app\debug.keystore
Release
keytool -list -alias my-key-alias -keystore android\app\my-release-key.keystore
or
keytool -list -alias my-key-alias -keystore android\app\my-release-key.keystore
Note alias is
my-key-alias
where i get alias as follow below command, that is used for generate Keystore file
keytool -genkey -v -keystore my-release-key.keystore -alias my-key-alias -keyalg RSA -keysize 2048 -validity 10000
This is name of keystore like my-release-key
you can put any name , that is not matter
One more example
here alias is mykeyalias
keytool -list -alias mykeyalias -keystore android\app\my-release-key.keystore
keyhash
Debug
keytool -exportcert -alias androiddebugkey -keystore android/app/debug.keystore | openssl sha1 -binary | openssl base64
out put ;Xo8WBi6jzSxKDVR4drqm84yr9iU=
Release
keytool -exportcert -alias my-key-alias -keystore android/app/my-release-key.keystore | openssl sha1 -binary | openssl base64
or outside project directory
keytool -exportcert -alias my-key-alias -keystore "C:\Users\sapan\Desktop\React Native\reduxpro\android\app\my-release-key.keystore" | openssl sha1 -binary | openssl base64

Step -1
- Seth the path of Java


Step -2
- we can generate a private signing key using keytool.
- open our Command Prompt (terminal) and copy and paste the below command.
keytool -genkey -v -keystore my-release-key.keystore -alias my-key-alias -keyalg RSA -keysize 2048 -validity 10000
or
keytool -genkey -v -keystore mykeystore.keystore -alias mykeyalias -keyalg RSA -keysize 2048 -validity 10000
or
Generating a signing key #
You can generate a private signing key using keytool.
keytool -genkey -v -keystore my-release-key.keystore -alias my-key-alias -keyalg RSA -keysize 2048 -validity 10000
This command prompts
you for passwords for the keystore and key, and to provide the Distinguished Name fields for your key. It then generates the keystore as a file called my-release-key.keystore.
The keystore contains a single key, valid for 10000 days. The alias is a name that you will use later when signing your app, so remember to take note of the alias.
Note: Remember to keep your keystore file private and never commit it to version control.
Step -3
- Note Remember Entered password of my-key-alias
- I recommended to Enter password as:- android
- default keystore file location is our under user directory like in mycase

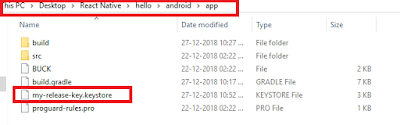
Step -4
- Adding Keystore to our project
Now, we have to place the created keystore file under the android/app directory in your react native project folder.
In My case

....................................................................................................................................................................................................................
Step -5
Add the following lines to android\app\build.gradle
signingConfigs {
release {
if (project.hasProperty('MYAPP_RELEASE_STORE_FILE')) {
storeFile file(MYAPP_RELEASE_STORE_FILE)
storePassword MYAPP_RELEASE_STORE_PASSWORD
keyAlias MYAPP_RELEASE_KEY_ALIAS
keyPassword MYAPP_RELEASE_KEY_PASSWORD
}
}
signingConfig signingConfigs.release
Like this

..........................................................................................................................................................................................................................
Step -6
Add the following lines to gradle.properties
or
android/gradle.properties
MYAPP_RELEASE_STORE_FILE=my-release-key.keystore
MYAPP_RELEASE_KEY_ALIAS=my-key-alias
MYAPP_RELEASE_STORE_PASSWORD=android
MYAPP_RELEASE_KEY_PASSWORD=android
MYAPP_RELEASE_KEY_ALIAS=my-key-alias
MYAPP_RELEASE_STORE_PASSWORD=android
MYAPP_RELEASE_KEY_PASSWORD=android

Note: my-release-key.keystore should be same name
...................................................................................................................................................................................................................................
Step -7
Generating APK
Place your terminal directory to android using,
cd android
Then run the following command
For windows --> gradlew assembleRelease
OR shorthand
cd android & gradlew assembleRelease

under below directory available our apk
C:\Users\sapan\Desktop\React Native\demo\android\app\build\outputs\apk\release
name:-
app-release.apk
name:-
app-release.apk
............................................................................................................................................................................................................................
Common Errors:-
Google play says: “You need to use a different package name” - why?Regardless of the name of the .apk file, the package name of the Application contents inside it must be unique.
Apart from correcting app name in the AndroidManifest.xml ,
I also had to change applicationId in the android/app/gradle.build file.
defaultConfig {
applicationId "com.example.changednameofmyapp"
}
..................................................................................................................................................................................................................
...................................................................................................................................................................................................................
Building a Debug APK for React Native apps
What is Debug Apk:
Creating the debug Apk
Open a terminal/command prompt inside the root directory of your project and run the following commands:
1 - mkdir android\app\src\main\assets
4 - app-debug.apk
C:\Users\sapan\Desktop\React Native\helloworld\android\app\build\outputs\apk\debug
app-debug.apk
Privacy Policy
https://app.freeprivacypolicy.com/builder/start/free-terms-conditions...................................................................................................................................................................................................................
Building a Debug APK for React Native apps
What is Debug Apk:
- An Android app will execute in debug mode in the development environment
- The debug apk must be enabled the debug logging, StrictMode and the debugging options.
- The debug apk not ready for the app stores.
Creating the debug Apk
Open a terminal/command prompt inside the root directory of your project and run the following commands:
1 - mkdir android\app\src\main\assets
2 - react-native bundle --platform android --dev false --entry-file index.js --bundle-output android/app/src/main/assets/index.android.bundle --assets-dest android/app/src/main/res
3 - Change to /android directory and run gradlew to build the APK:
gradlew clean assembleDebug
or
cd android && gradlew clean assembleDebug
4 - app-debug.apk
C:\Users\sapan\Desktop\React Native\helloworld\android\app\build\outputs\apk\debug
app-debug.apk
...................................................................................................................................................................................................................
Reducing the size of the APK
You need to enable Proguard which removes the bytecode and dependencies which your app doesn’t use and reducing the size of your APK slightly.
Add the following line under buildTypes in android\app\build.gradle
android {
...
buildTypes {
release {
...
minifyEnabled true
}
}
reduce file size
changing the following line in android/app/build.gradle:by default it's false
def enableSeparateBuildPerCPUArchitecture = true
def enableSeparateBuildPerCPUArchitecture = true
.................................................................................................................................................................
...........................................
Some Tips Using command prompt or Terminal
Then open the terminal on your computer and type:
Debug
keytool -list -alias androiddebugkey -keystore android\app\debug.keystore
if you want to print all output
use -v flag
keytool -list -v -alias androiddebugkey -keystore android\app\debug.keystore
Release
keytool -list -alias my-key-alias -keystore android\app\my-release-key.keystore
or
keytool -list -alias my-key-alias -keystore android\app\my-release-key.keystore
Note alias is
my-key-alias
where i get alias as follow below command, that is used for generate Keystore file
keytool -genkey -v -keystore my-release-key.keystore -alias my-key-alias -keyalg RSA -keysize 2048 -validity 10000
This is name of keystore like my-release-key
you can put any name , that is not matter
One more example
here alias is mykeyalias
keytool -list -alias mykeyalias -keystore android\app\my-release-key.keystore
keytool -genkey -v -keystore mykeystore.keystore -alias mykeyalias -keyalg RSA -keysize 2048 -validity 10000
keyhash
Debug
keytool -exportcert -alias androiddebugkey -keystore android/app/debug.keystore | openssl sha1 -binary | openssl base64
out put ;Xo8WBi6jzSxKDVR4drqm84yr9iU=
Release
keytool -exportcert -alias my-key-alias -keystore android/app/my-release-key.keystore | openssl sha1 -binary | openssl base64
or outside project directory
keytool -exportcert -alias my-key-alias -keystore "C:\Users\sapan\Desktop\React Native\reduxpro\android\app\my-release-key.keystore" | openssl sha1 -binary | openssl base64

It was a great information and Its really worth reading it.
ReplyDeleteReact JS Online training
React JS training in hyderabad