We will cover:
- Installing Windows Terminal
- Installing Git
- Installing Expo
- Installing Visual Studio Code (IDE)
Installing Windows Terminal:
let's open microsoft store and search for windows terminal and install it, after that we can launch it.


let's test it out so if i write ls i see all the folders that they have here.

The Next step is to install git and we will use git both for source control management and also git bash that it comes with so let's go to https://git-scm.com/downloads.
we can download it for windows after that let's open the installation guide all right next


What changes we should do let's check the last one in order to add git bash profile to the windows terminal that we installed previously let's leave everything else by default next

Next here let's override the default branch name for new repository with main because this is the new default and the new rule to have like the main branch as main.

Alright so on this screen I'm gonna choose the third one because this one will provide me with some unix tools and it's useful for me because i'm coming from linux and mac os and That's why i will choose this one you can also go with the recommended one it's gonna work as well as expected. let's press on the next one and let's leave it as default.

let's open our windows terminal this will automatically open a power shell but we can go on this arrow and open a git bash so let's see if it opens and here i can write git --version


I'll also set the git bash as the default so let's go to setting and default profile will be git bash save it.


Go to Terminal and automatically open git bash.
Installing NodeJS
NodeJS is an open-source Javascript runtime environment that will help us run React Native applications. It also comes with npm which is a package manager that helps to install various packages in our applications.
We're gonna go to node js https://nodejs.org/en/
To download NodeJS go to their website and select the LTS (long term support) version.


During the installation leave everything on default except for the window below. It is very important to tick this box in order to install necessary tools automatically, otherwise you will have to do that manually.
Note - you can skip also

To test if node was installed correctly open the terminal and type node --version, which should display the version that was installed. To test if npm was installed correctly type npm --version, which accordingly will display the npm version.
- node --version
- npm --version

To install Expo CLI, you simply have to open the terminal and type npm install --global expo-cli. we need to add --global in order to install Expo CLI globally.


expo-cli --version

Installed successfully, let's try to initialize a project and see if everything works. Now we can create our first React Native project!
In order to create a new Expo project, in the terminal we can simply type expo init. You will be asked a few questions in order to finalise the initialisation. First of all, you will need to provide the name of your application. As it is our first application, let's name it 'myapp2'

After that, you will have to choose a template that you would like to use for your application. In this step you can choose whatever you like, but for demonstration purposes we chose blank template.

To run the application you will have to type cd myapp2 in the terminal, which will go to your project's folder and then type npm start to start the development server.
Note -Click the Turn off Windows Firewall (it's optional) for sometimes.

Running The Application
Now it's time to run the application on your device. But in order to do that, we still need a little bit of setting up.
First things first, if you don't have an Expo account yet, we should create one on their website https://snack.expo.dev/
After creating an Expo account, you should be able to login by typing expo login in the terminal and providing your username or email as well as password. If provided credentials were correct, you should see a success message.
You can also test if you have logged in successfully by typing expo who am i, which will display your username.

Setting Up Expo Go Mobile Client
Okay, now it will get a little bit more exciting. Grab your phone and install Expo Go application from the App Store or Google Play Store. After installing the application, launch it, login with the account you have just created and launch the application that's located under RECENTLY IN DEVELOPMENT tab.


Installation of Visual Studio Code
If you decided to go with Visual Studio Code as well, then you can download it from their website https://code.visualstudio.com/
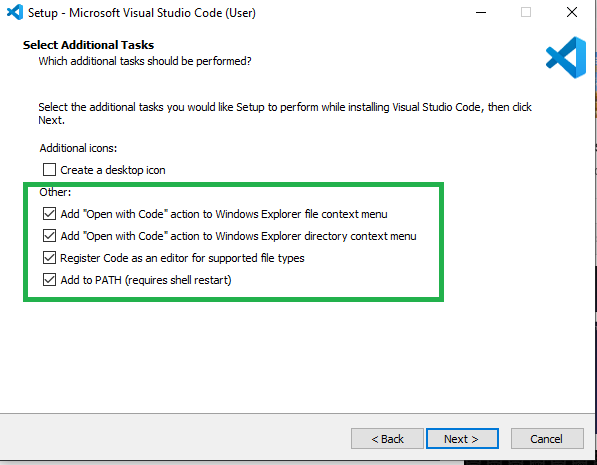
During the installation, you can make changes if you know what you are doing, otherwise I suggest leaving everything on default except for the window below. In here, tick all of the boxes under Other tab.
let's add open with code action in windows explorer in directory as well and let's register code as an editor for supported file types, let's install it

Now we can open our application on Visual Studio Code by navigating to the folder where you have created your 'myapp2' project, then clicking right mouse button anywhere on the white space and clicking Open with Code.

You might be asked to verify that you trust the authors of the files in this folder. Check the box 'Trust the authors of all files in the parent folder' and click Yes, I trust the authors button.

Open the new terminal by pressing ctrl +shift+`
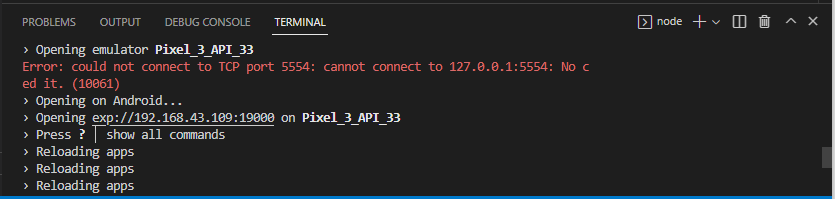
From here again you can write npm start and this will do the same it will start our expo project and we will be able to run it from here.

Create, Test & Debug a React Native App Using Expo
npx create-expo-app myapp
expo start --ios
expo start --android
or
npm run ios
keep learning :)